
[Django][The Polls][Chap 5] Admin Default Template Override하기
Info Notice:
안녕하세요. HwanSeok입니다. The Polls 프로젝트는 docs.djangoproject.com를 참조하여 진행됩니다. 본 포스팅은 전체적인 개발 흐름과 The Polls 프로젝트를 효과적으로 이해하기 위한 설명이 포함되어 있습니다.
결과
간단한 설정으로 Admin 페이지에서 필요한 많은 기능을 설정할 수 있습니다.
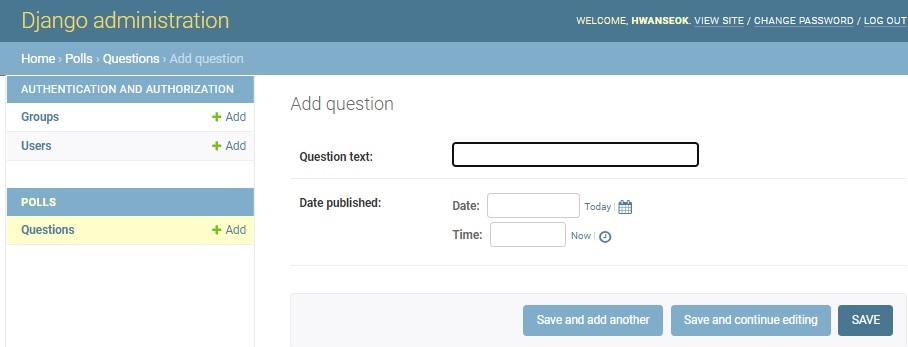
기존에는 Question에 대한 Field가 다음과 같은 순서로 표기됩니다.
1
2

# polls/admin.py
admin.site.register(Question)
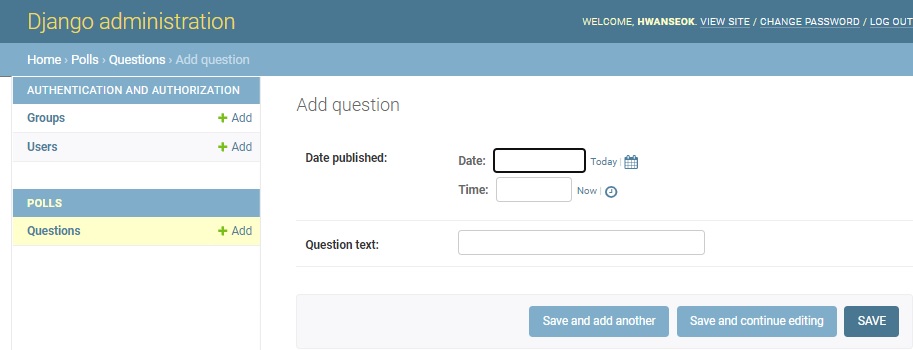
다음과 같이 수정하면 Fields의 표기 순서를 설정할 수 있습니다.
1
2
3
4
5
6

# polls/admin.py
class QuestionAdmin(admin.ModelAdmin):
    fields = ['pub_date', 'question_text']


admin.site.register(Question, QuestionAdmin)
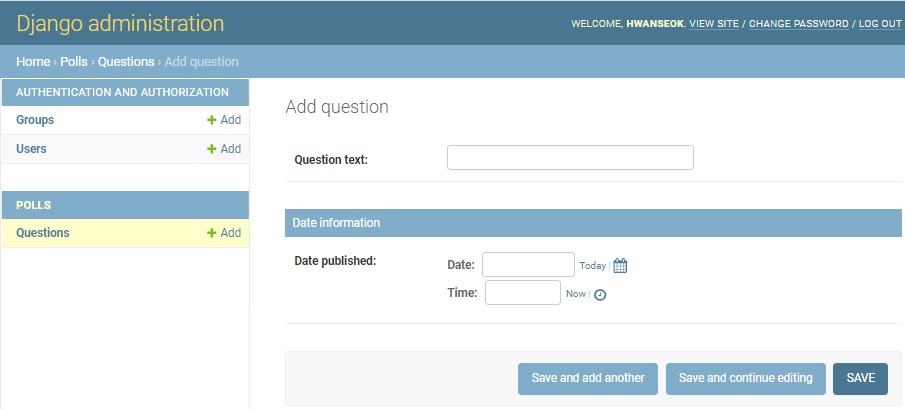
다음과 같이 수정하면 Fields를 다음과 같이 구역을 나누어서 표기할 수 있습니다.
1
2
3
4
5
6
7
8
9

# polls/admin.py
class QuestionAdmin(admin.ModelAdmin):
    fieldsets = [
        (None, {'fields': ['question_text']}),
        ('Date information', {'fields': ['pub_date']}),
    ]


admin.site.register(Question, QuestionAdmin)
다음과 같이 추가하면 Choice 객체의 정보를 Question 정보처럼 같은 형태로 볼 수 있습니다. 하지만 Question 안에 Choice 객체가 있다는 직관적인 인사이트는 줄 수 없습니다. 대신 Choice를 생성/수정/삭제할 때 연관된 Question을 골라야 합니다. Model을 생성할 때 FK를 설정한대로 동작합니다. 이 부분은 사진이 없습니다.
1
2

# polls/admin.py
admin.site.register(Choice)
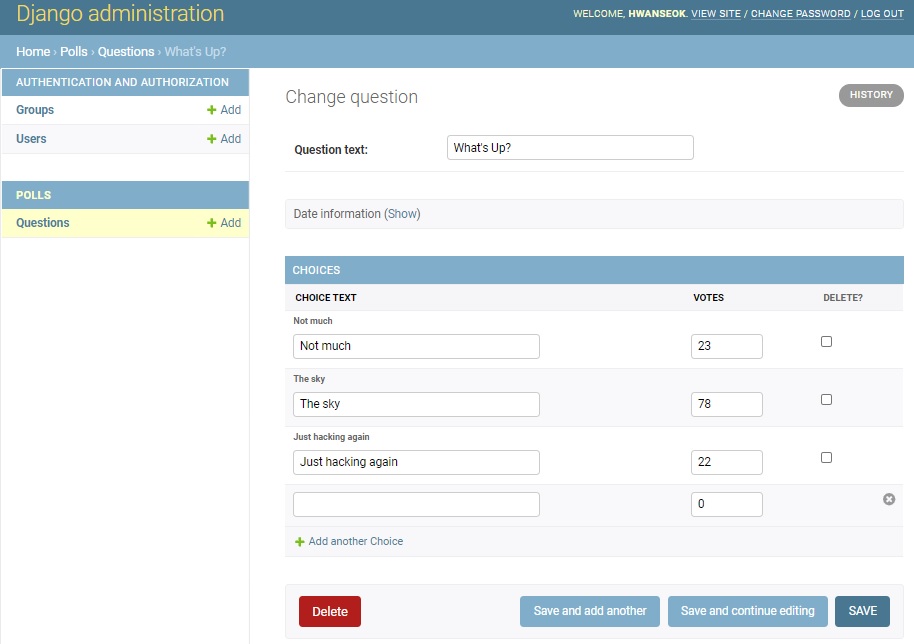
아래와 같이 수정하면 Question 하위 단계에서 Choice를 확인할 수 있습니다.
1
2
3
4
5
6
7
8
9
10
11
12
13
14
15

# polls/admin.py
class ChoiceInline(admin.StackedInline):
    model = Choice
    extra = 1


class QuestionAdmin(admin.ModelAdmin):
    fieldsets = [
        (None, {'fields': ['question_text']}),
        ('Date information', {'fields': ['pub_date'], 'classes': ['collapse']}),
    ]
    inlines = [ChoiceInline]


admin.site.register(Question, QuestionAdmin)
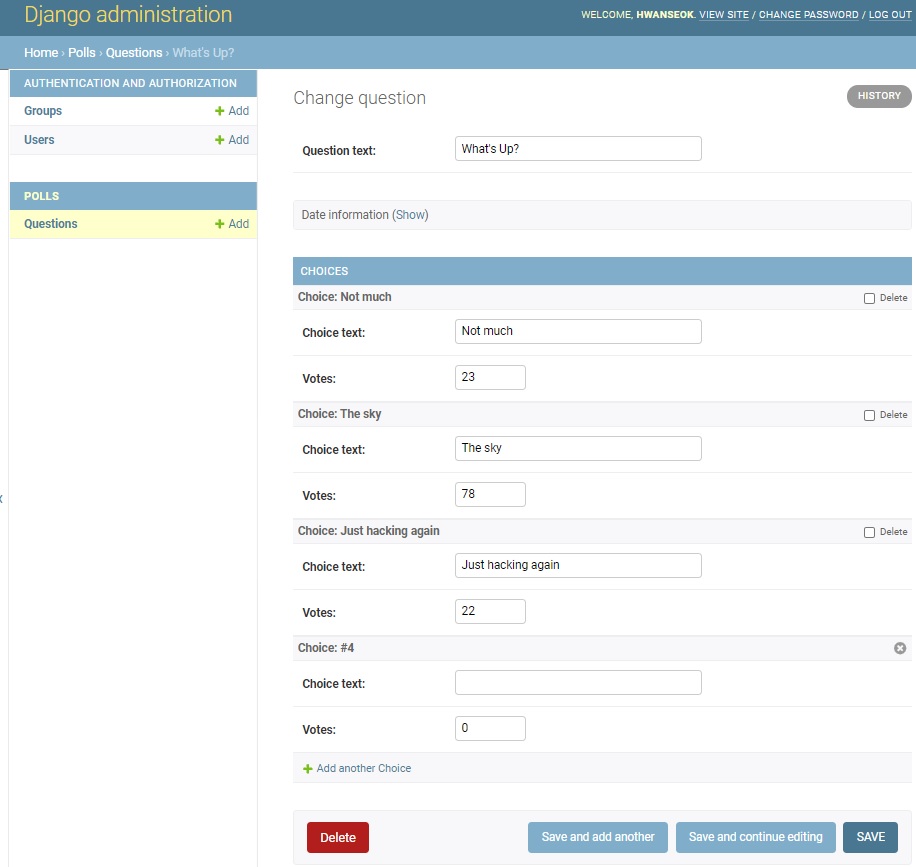
ChoiceInline을 아래와 같이 수정하면 더 컴펙트하게 볼 수 있습니다.
1
2
3
4

# polls/admin.py
class ChoiceInline(admin.TabularInline):
    model = Choice
    extra = 1
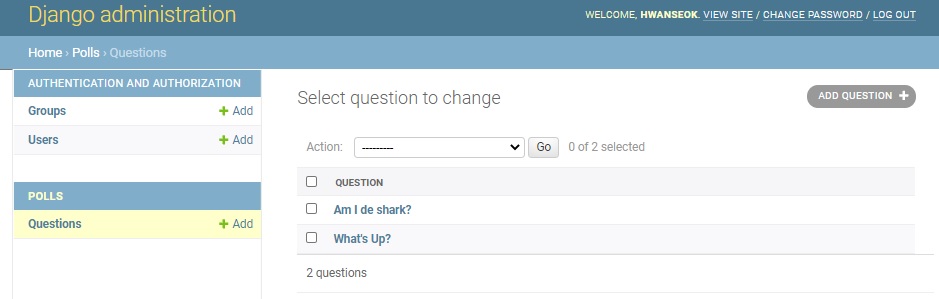
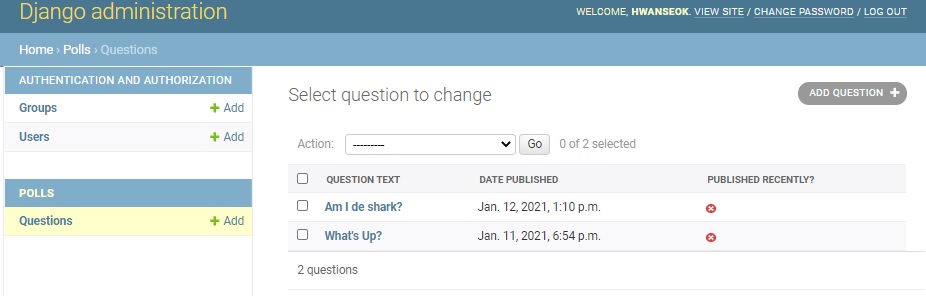
현재 Question의 목록은 다음과 같습니다.
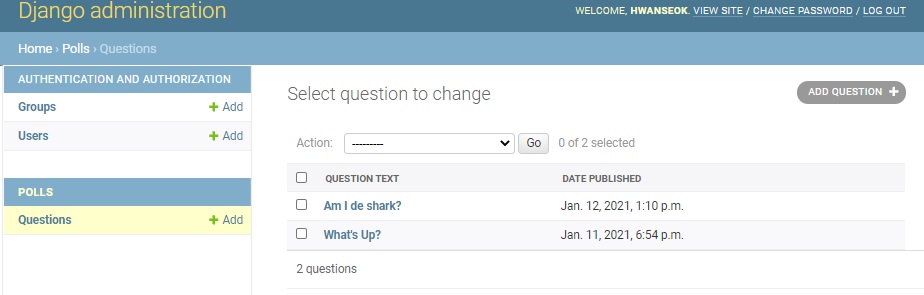
QuestionAdmin에 list_display, list_filter, search_fields를 추가하면 객체 list 페이지에서 목록에 보이는 Field를 수정하고, Fitter가 생깁니다. 검색해서 객체를 보여주는 Fitter와 Fields의 값으로 자동으로 설정되는 Fitter 모두 생깁니다.
1
2
3
4
5
6
7
8
9
10


class QuestionAdmin(admin.ModelAdmin):
    fieldsets = [
        (None, {'fields': ['question_text']}),
        ('Date information', {'fields': ['pub_date'], 'classes': ['collapse']}),
    ]
    inlines = [ChoiceInline]
    list_display = ('question_text', 'pub_date', 'was_published_recently')
    list_filter = ['pub_date']
    search_fields = ['question_text']
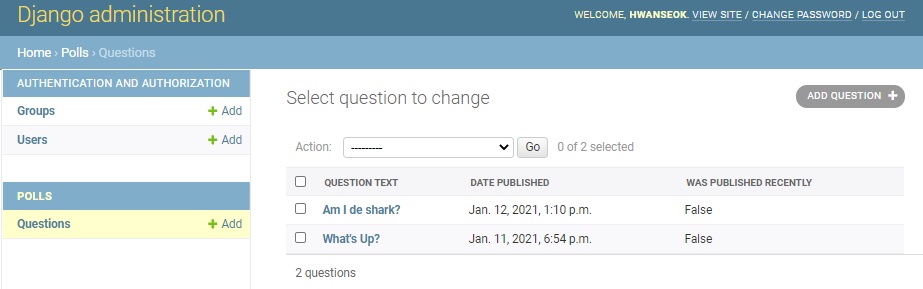
Question 객체를 정의할 때 was_published_recently 속성을 추가하면 조금 더 효과적으로 보여줄 수 있습니다.
1
2
3
4
5
6
7
8
9
10
11
12
13
14
15

# polls/model.py
class Question(models.Model):
    question_text = models.CharField(max_length=200)
    pub_date = models.DateTimeField('date published')

    def __str__(self):
        return self.question_text

    def was_published_recently(self):
        now = timezone.now()
        return now - datetime.timedelta(days=1) <= self.pub_date <= now

    was_published_recently.admin_order_field = 'pub_date'
    was_published_recently.boolean = True
    was_published_recently.short_description = 'Published recently?'
다음 그림은 객체의 Fields의 타입에 따라서 django가 자동으로 생성한 Fitter를 적용할 때 API가 호출되는 모습을 보여줍니다. date published를 기준으로 쿼리를 날리는 모습입니다.
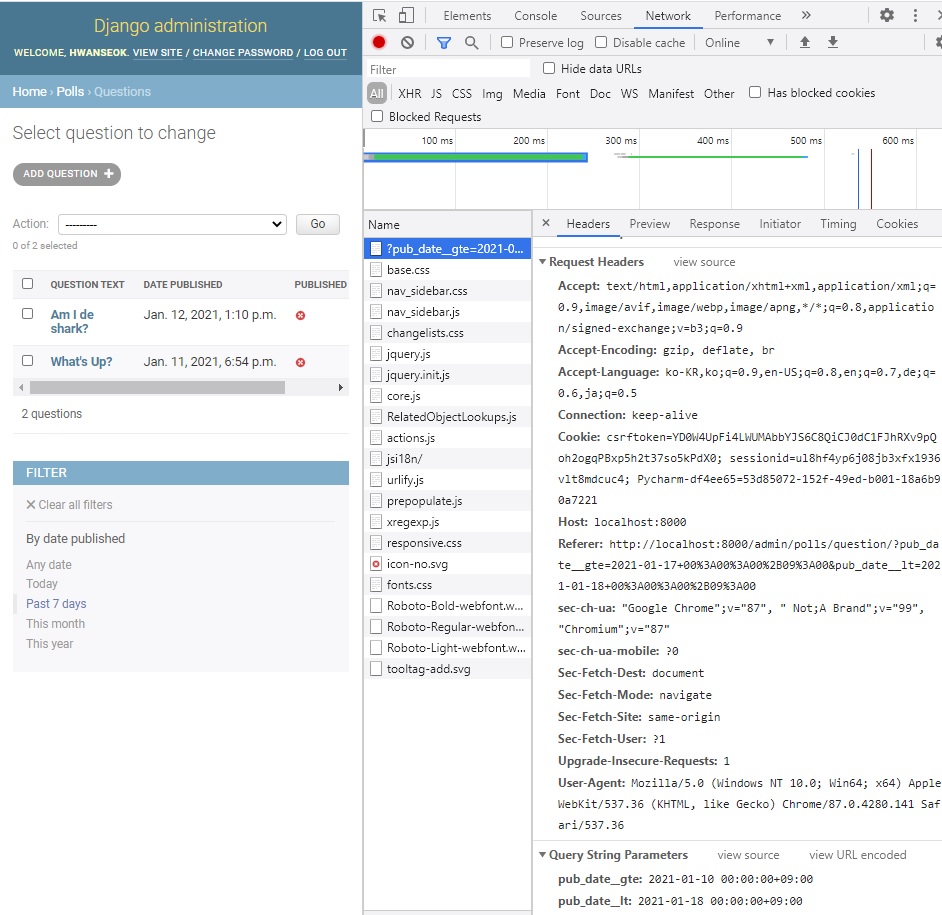
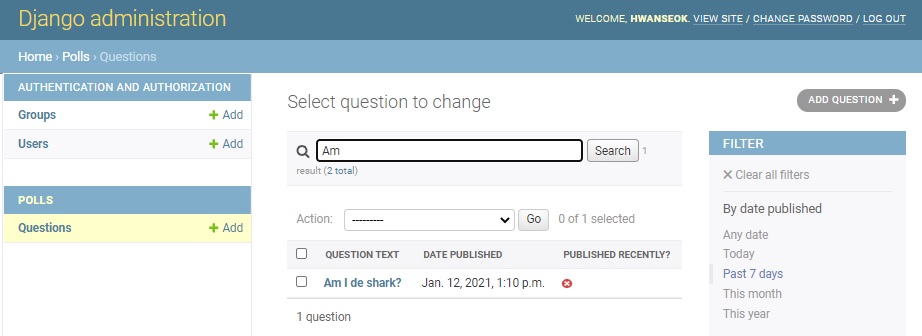
마지막으로 객체 검색에 사용되는 fitter가 Question Text의 값을 쿼리할 수 있음을 보여줍니다.
다음과 같이 admin의 default 타이틀을 바꾸기 위해서는 아래와 같이 해야합니다.
먼저 아래 명령어를 통해 django의 경로를 알아내고
1
2

$ py -c "import django; print(django.__path__)"
['C:\\{MY_DIRS}\\Python\\Python36\\lib\\site-packages\\django']
알아낸 경로에서 다음의 하위 경로로 들어가면 default html 파일들을 볼 수 있습니다.
1

cd django\contrib\admin\templates\admin
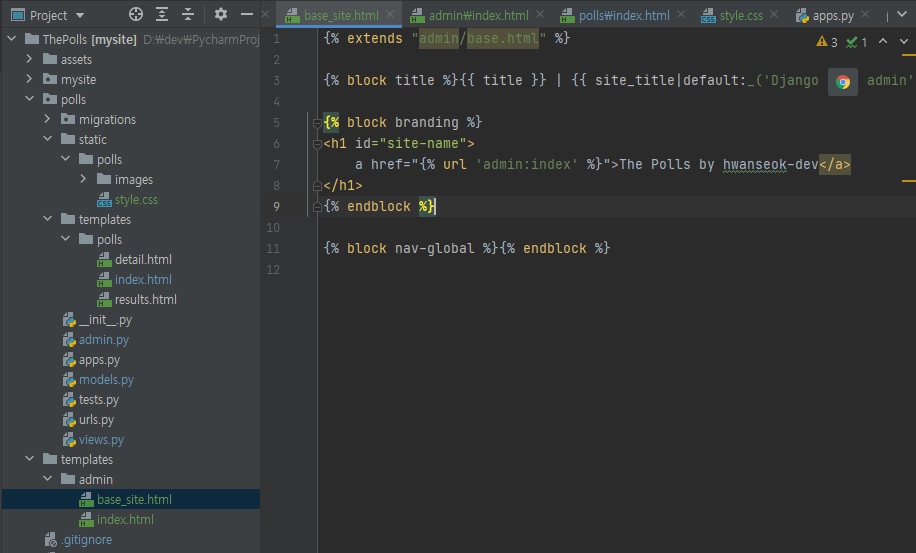
여기서 base_site.html를 찾아 프로젝트의 root에 templates\admin directory를 만들고 base_site.html를 복사해서 수정하면 해당 파일이 override 됩니다.
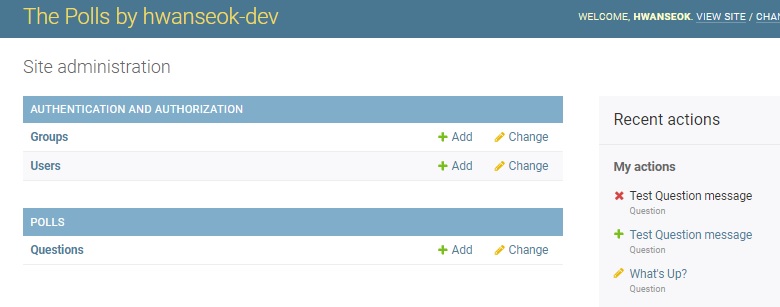
Success Notice:
위와 같은 과정을 거쳐 처음에 보았던 결과 페이지를 생성하였습니다. 수고하셨습니다. ![]()
개발환경
- window 10
- python 3.6.8
- django 3.1.5
Leave a comment